Examining SmartScopes with the Sig BDX 2.0 System and Sierra6BDX Scope Review
Table of Contents:
– Introduction of the Smart Rifle Scope Concept
– The Sig Kilo10K-ABS HD Rangefinding Binoculars and Ballistic Modeling
– Unboxing the Sierra6BDX,Look, and Feel
– Field Testing
– Setup and Modes of Function
– Reticle and Digital Focal Plane
– Optical Performance
– Mechanical and Digital Reticle Testing
– Summary and Conclusion
Introduction of the Smart Rifle Scope Concept:
The idea of designing a scope that automatically ranges the target and then highlights the correct aiming point for the shooter is an obvious one. So obvious, in fact, that quite a number of makers have produced products with this end in mind, though with varying degrees of success. Burris first released a product of this type with the Eliminator in 2011. They are now on generation 5 of that product. In the meantime, the ill-fated, much hyped, and maddeningly inflexible, Tracking Point came, unleashed drama, and was quietly sold. Swarovski entered the market as well with its dS smart rifle scope, now in it’s second generation. Trijicon even came up with a very military centered product in the CCAS.
Through the lens of the TrackingPoint system at ShotShow 2014 range day
However, what Sig did with this smart rifle scope concept when they released the BDX system a couple years ago was quite unique. Sig physically separated the laser and the rifle scope and created a system where they communicate wirelessly with each other. The rifle scope still has a display in it and will display illuminated dots for your wind and drop compensation just as in an integrated unit, but with a number of added advantages.
First, you can mix and match any BDX capable rifle scope with any BDX capable rangefinder. The combination I am testing here, with the Kilo 10k range finding binoculars and Sierra6BDX 3-18x44mm scope, is quite pricey, but getting into a BDX setup can be done much more affordably. This ability to mix and match gives the user a great deal of choice in terms of the form factor of the rangefinder (bino or monocular), how much ranging capability he needs, how much scope magnification he would like, whether he wants to pay for a 6x erector ratio scope or can live with a lower cost 3x one, and weather he can live with ABS Ultralite software or wants ABS Elite. There are currently 10 BDX rifle scopes and 7 rangefinders, giving the user effectively 70 different total packages to choose from, ranging in cost from ~$550 to ~4,000. That is a lot more choice than the single smart scope model each other company in this niche manufactures and, frankly, starts at a much lower cost. Furthermore, a BDX user can use more than one scope with a rangefinder, though not simultaneously. This means that you could have a BDX scope on your hog gun, another on your deer rifle, and a third on a squirrel gun, all using the same rangefinder.
The second major advantage gained by separating the ranging unit from the rifle scope is that the shooter gains field observation glass in the process. Rangefinders, particularly if they are in the form of binoculars, make fine or at least passable field observation glass. The field of view is tremendously large compared to that of a rifle scope, the unit is handheld and light, and you’re not swinging your rifle around flagging everything in sight. Realistically, if your rangefinder is part of a scope, you either have to carry a set of binoculars or go without field glass. If the rangefinder is separate from the scope, it can double as that field glass.
Finally, you can obviously have a smaller and lighter scope if it does not include a rangefinder onboard. Certainly, the rifle is a less convenient place to carry extra weight than a handheld optic, so offloading this weight to a standalone rangefinder will make for a more comfortable to carry gear arrangement, even if the overall weight carried is increased.
All in all, I think Sig’s idea to create a smart rifle scope system as opposed to a smart rifle scope is a good move.
The Sig Kilo10K-ABS HD Rangefinding Binoculars and Ballistic Modeling
Last month I did a review of the Sig Kilo10K-ABS HD rangefinding binoculars that will be used as the rangefinding component of this examination of the BDX 2.0 system. In addition to information specifically about the 10k binoculars, that review also included significant sections of background information on ballistic modeling, and on how laser rangefinders work. For the sake of brevity, I do not wish to duplicate that information here. Readers with interest in any of those aspects of the BDX 2.0 system are encouraged to find answers in the Sig Kilo10K-ABS HD review.
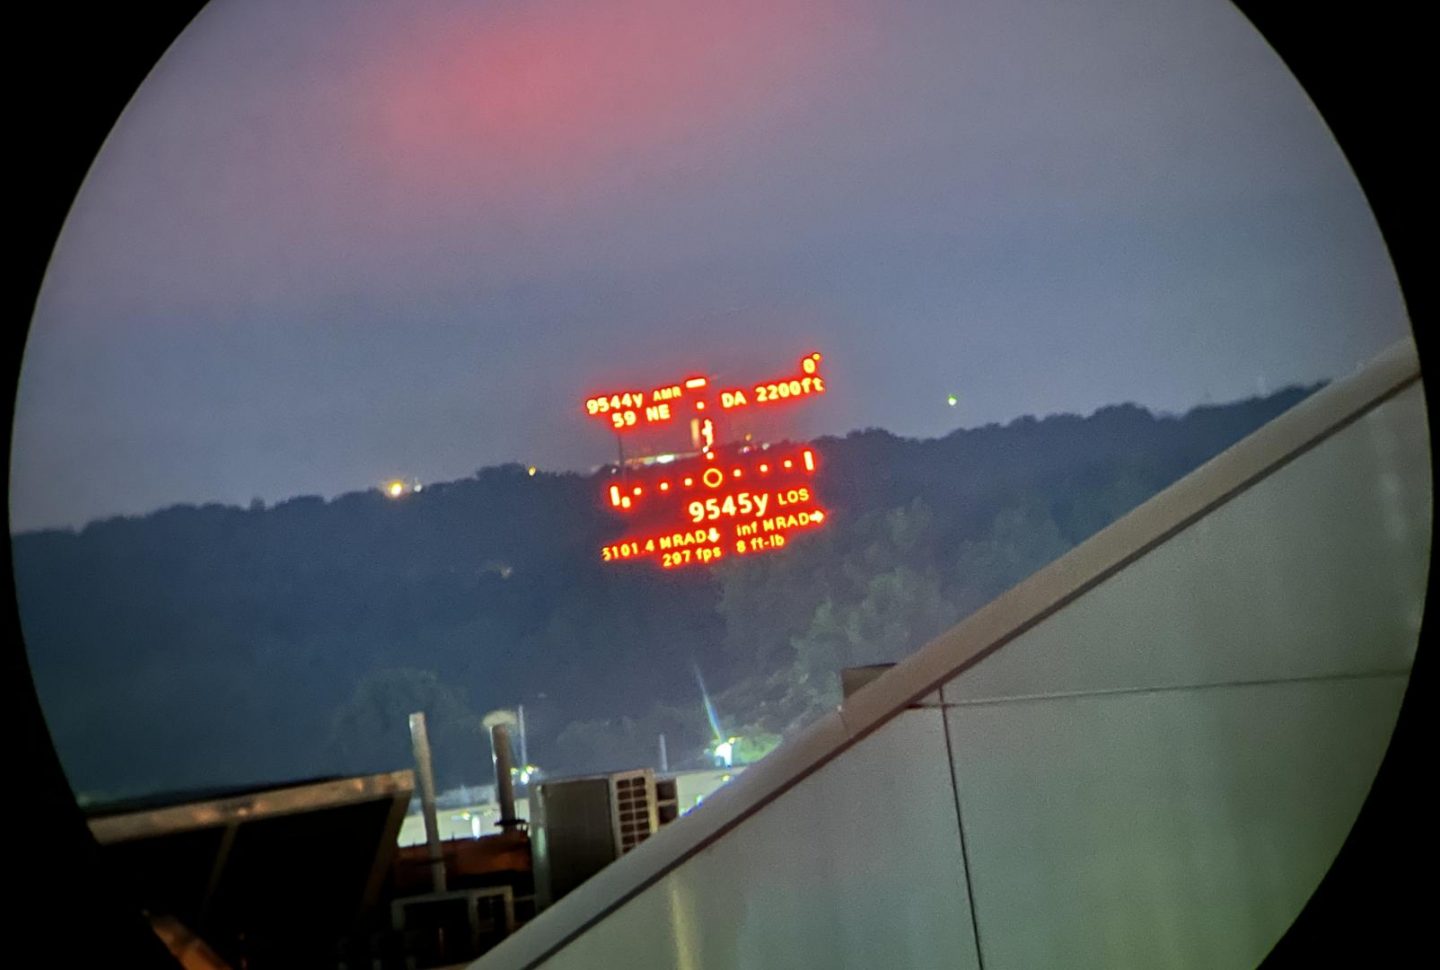
Ranging 9,545 yds with the Sig Kilo10K-ABS HD Binoculars
Unboxing the Sierra6BDX, Look, and Feel:
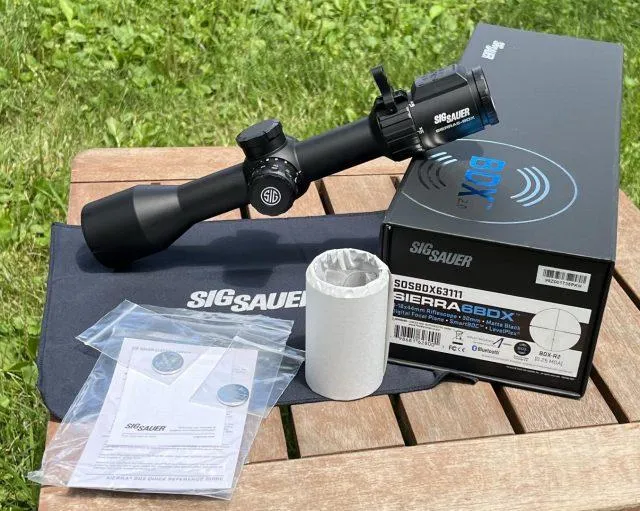
As with other Sig rifle scopes I have encountered, the Sierra6BDX comes in a swanky, magnetic close, thick cardstock box. Extras included are a sunshade, lens cloth, and removable aluminum throw lever. Two very brief instruction cards are also included. One of these is a laminated quick guide with some very good basic information about getting set up. The second is a guide for setting up your BDX scope for use without a rangefinder. This “smart BDC” mode consists of an illuminated dot at the correct drop for each 100yd increment out to 500yds for a selected cartridge family.
The Sierra6BDX 3-18x44mm scope itself is quite small and light at 23.8oz and exactly 1 foot in length. Turrets are capped, low profile, finger adjustable, and have .25moa clicks with a re-positional zero. They are 20moa per turn and move with about average force. They are clearly intended for zeroing only, as drop and wind compensation are intended to be done using the illuminated BDX reticle. The Sierra6BDX also features a combined illumination / parallax knob with focus down to 50 yds. This knob also houses the units 2x 2032 batteries inserted one directly atop the other. The parallax knob, mag ring, illumination selector, and euro style diopter all move smoothly but on the stiff side. The only outward indication that the Sierra6BDX is a BDX scope is a little bump atop the eyepiece which houses the antenna and an LED which illuminates when the unit is in use. Clearly the intention was for the Sierra series to appear very much like conventional rifle scopes and they are quite successful at this. The Sierra has a 30mm maintube and uses conventional 30mm rings for mounting giving the user plenty of choices.
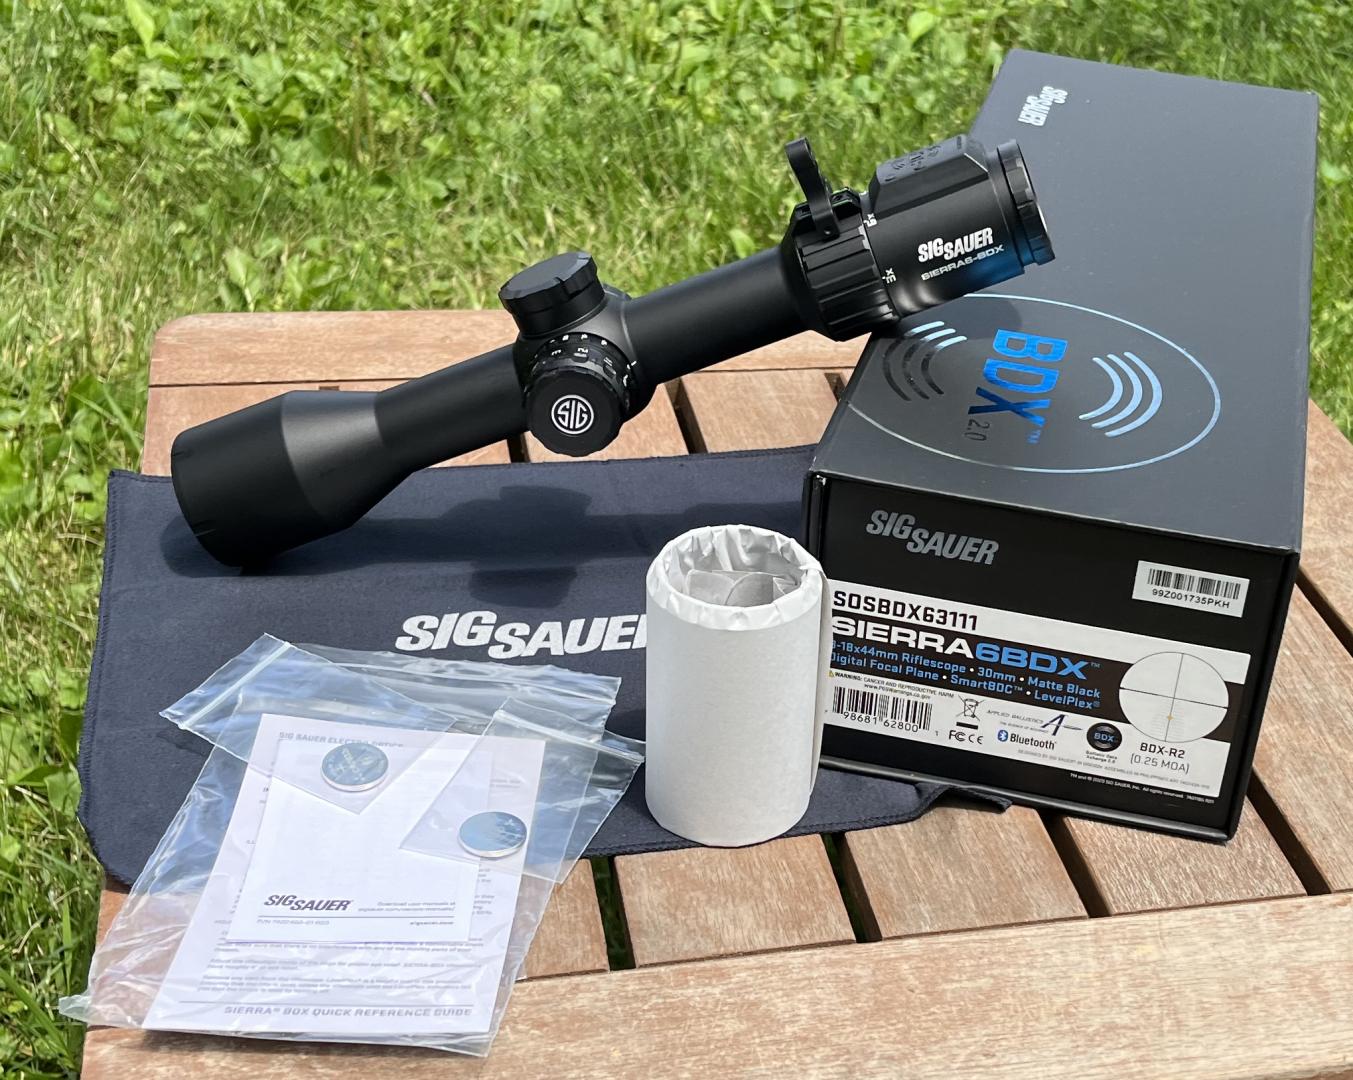
Sig Sierra6BDX 3-18x44mm Unboxing
Field Testing
In a departure from my normal pattern, I decided to field test the BDX system before putting it on the bench. I wanted to use the BDX system in the way I think most users will, instead of essentially lab testing every aspect of its performance first. I figured most guys will probably zero their BDX scope at the square range, drop the numbers off the ammo box in the app, and go. So that is what I did. I grabbed the bullet BC from the AB library in the app and used the velocity printed on the box. For this testing, I used my Vudoo .22lr because I wanted to have easy access to really big amounts of angular drop and nothing delivers that like .22lr. So, I guess I tested the BDX in squirrel annihilation configuration.
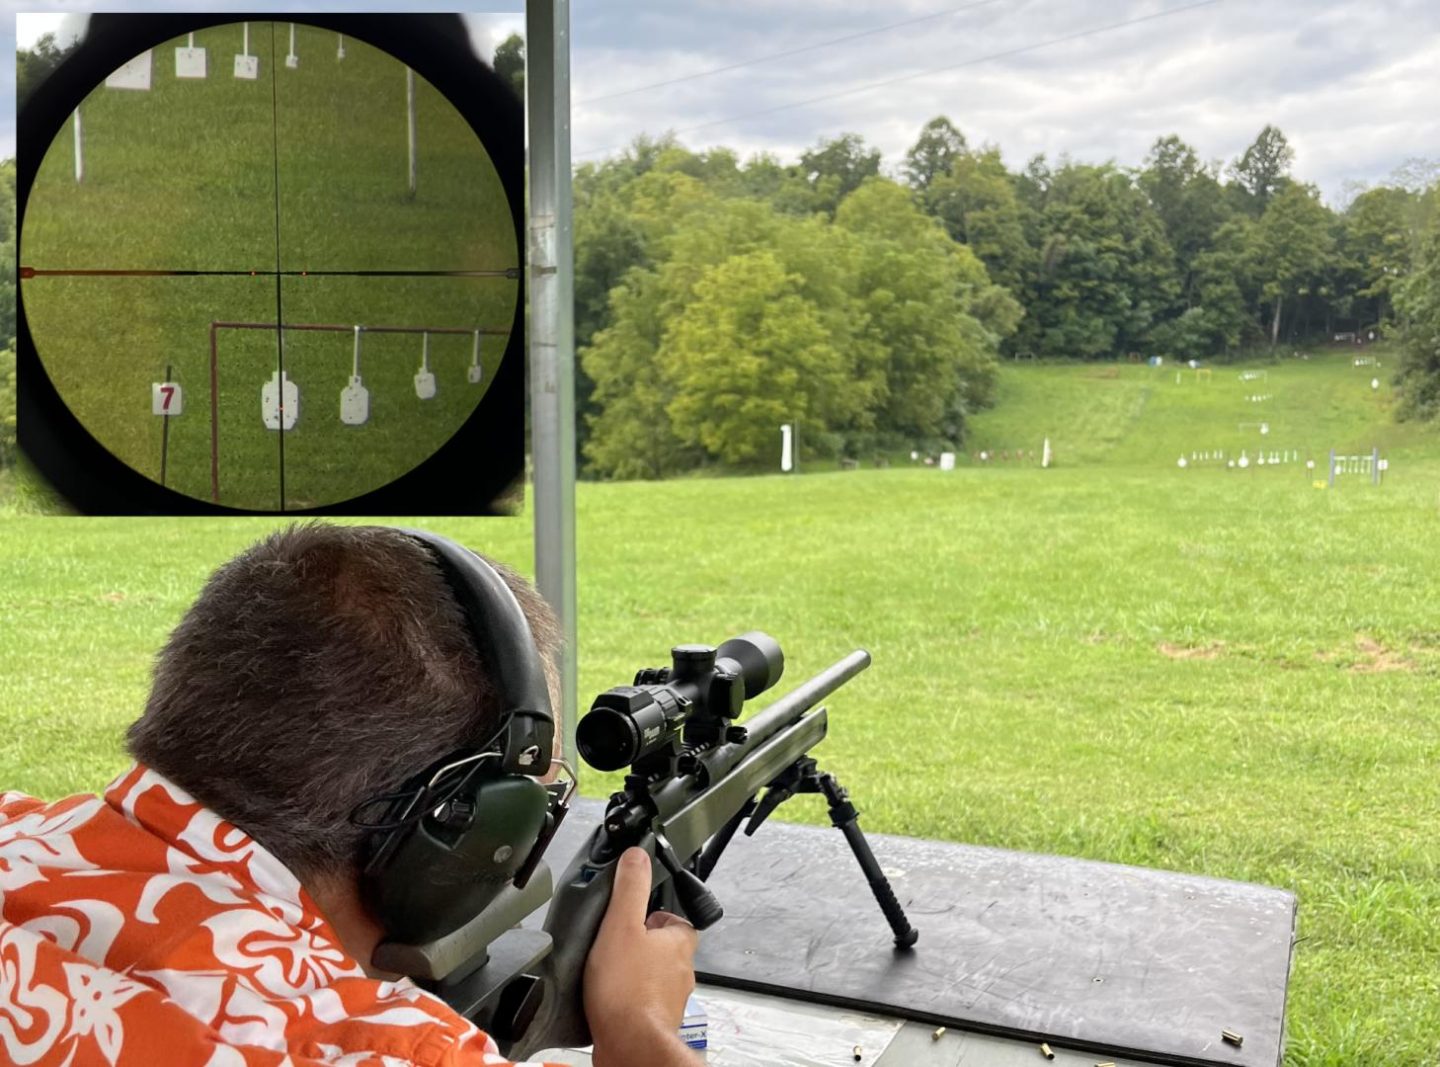
Hiding from the rain shooting the BDX 2.0 system on the covered 250yd .22lr range
I should note that I did not expect this to go perfectly. I have used a number of ballistic calculator applications and found that models are rarely spot on without fine tuning muzzle velocity and BC. Typically, you are off a few tenths as you get out to a handful of mils in drop and my plan was to address this with the muzzle velocity truing menu available on the app screen when you use the BDX system while connected to the app. This would not have been a good plan as the BDX app maddeningly does not currently allow you to use its truing function at closer than 300yds. In my case, this did not turn out to matter, though, as the model ended up needing no truing. For most users of .22lr and other slow rifle cartridges such as the straight walled ones used in most of the eastern U.S., however, this 300yd minimum is an issue.
Imagine my surprise after only inputting the stock data off the box to be ringing target after target all the way out to the 250 yard limit of the .22lr range and then even out to 376 yds / 18.2 mils drop on one of the centerfire ranges. My past experience has taught me ballistic models are seldom correct without any truing. AB elite and its custom models have been changing this pattern. Many models, though not all, I have tested in AB elite have been spot on without truing at the word ‘go’. These .22lr targets were not even forgiving meatballs. Many subtended as little as .2-.3 mils at their distance. It was a perfectly windless drizzly cold day with no mirage. Just the kind of day on which you can hit everything as long as your dope is good and, somehow, with box top velocity numbers, it was. My brother and I made a game of it. One of us took the binos, lazed, and called out the target number. The other saw how fast he could “connect the dot”. It was a great time despite getting soaked after we left the covered .22lr range for the uncovered centerfire stations. We certainly left with a glowing impression of how quick and easy the BDX system could make long range shooting.
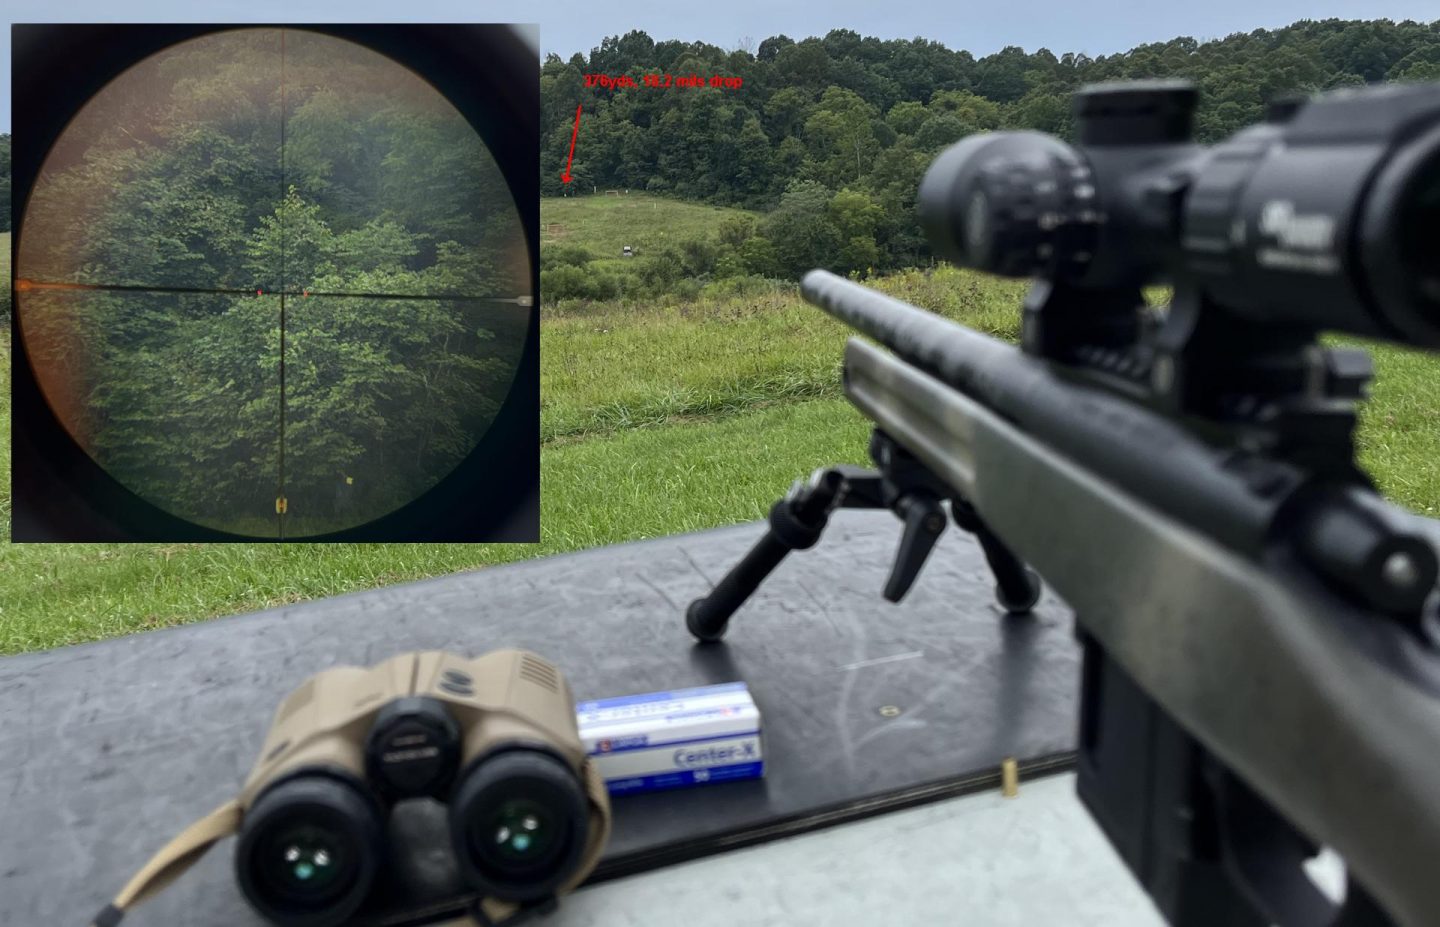
Shooting the BDX 2.0 system 376yds with 18.2mils drop from a Vudoo V-22 with Proof barrel
Setup and Modes of Function:
The Sig BDX 2.0 system is quite flexible. Both the BDX scopes and the Rangefinders can work alone, in concert with the BDX smartphone app, with each other, with each other and the smartphone app, and, on some models, the rangefinder can even work with a 3rd party ballistic calculation device such as a Kestrel. To accommodate this, each unit has a number of different modes in which it can be used.
Each Sig rangefinder comes out of the box ready to range in simple line of sight mode. Without ever connecting to the app, angle modified range can also be set in the rangefinders menu, as well as any of a number of pre-programmed general ballistic group profiles. Selecting one of these will give you a ballistic solution in the same way creating a ballistic profile will – just don’t expect that solution to be great. For example, the same group includes 55gr .223 Rem and 175gr .308 Win. There is a lot of difference in the trajectory of these two rounds. Ideally, one connects the rangefinder to the App and creates a ballistic profile from the specifics of the bullet being used and its muzzle velocity. All of the BDX rangefinders have either Applied Ballistics Ultralite or AB Elite baked into the rangefinder and the app. Details on the differences you can find in the Sig Kilo 10k review. Once a profile has been uploaded to the rangefinder from the app, the rangefinders can do the calculations and display the firing solution unconnected or connected to the app. Similarly, most settings for the rangefinder can be changed in both the app or in the rangefinding unit. Obviously, it is easier to do this with the app than the rangefinder, as you have a big pretty screen and menu system to work with. As you can see, BDX rangefinders are quite capable to be used as simple rangefinders, combination rangefinders and ballistic calculators, or as a full part of the BDX system. I expect probably more BDX rangefinders are in fact used as standalone rangefinders / ballistic calculators than are used with the full BDX system. Sig rangefinders are quite popular.
If you are using the full BDX system, however, you will need to pair the rangefinder with a BDX scope. This can be easily done in the app, but also without the app though a simple quick bond procedure. It’s very easy, and after pairing, the rangefinder will directly send ballistic solutions to the BDX scope whether connected to the app or not. These solutions can be from a ballistic profile the user has created themselves or one from one of the preset groups.
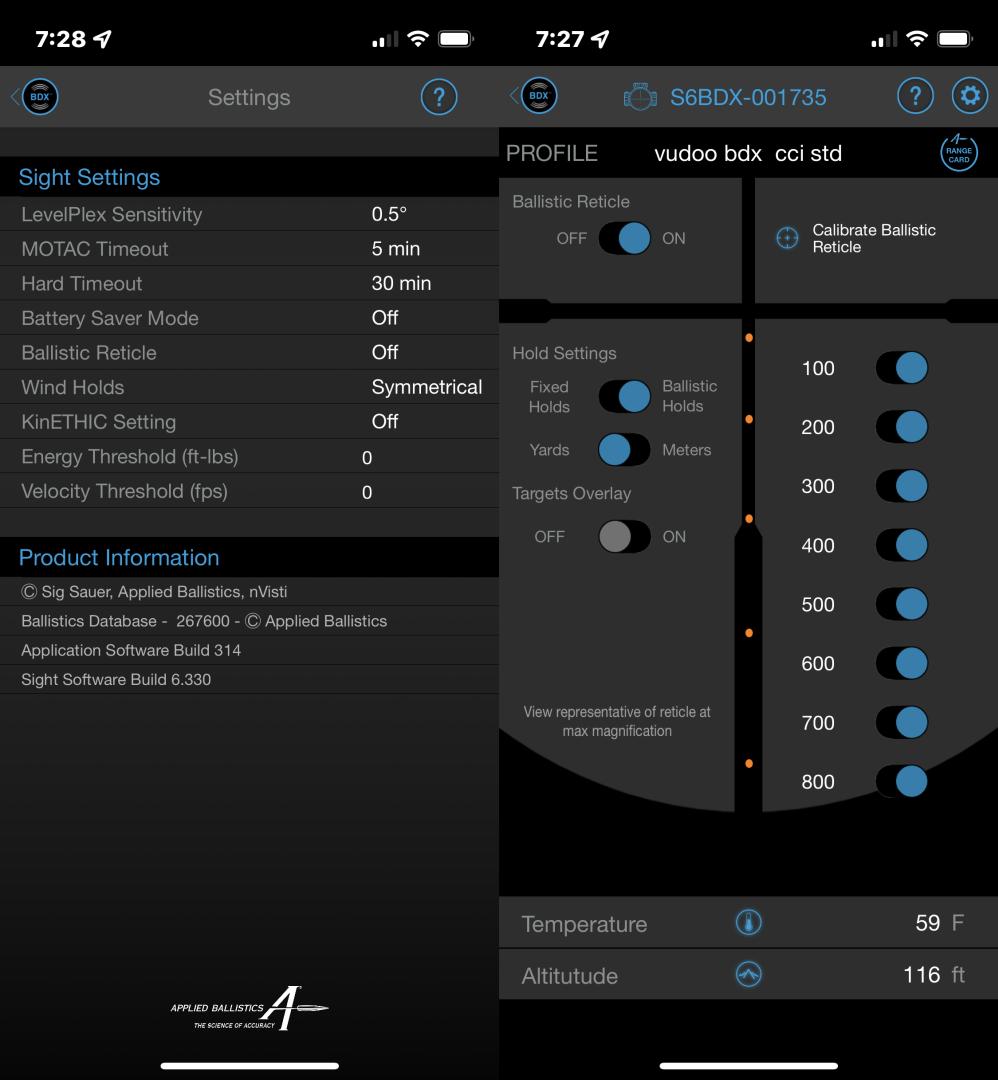
The Sight Settings Selection Screens in the Sig BDX App
Just as with the rangefinder, the BDX scope can be used in a variety of different ways with the use of a BDX rangefinder and the BDX app or without. If the user does not possess a BDX rangefinder, the BDX scope can be configured in three different simple ways. The little instruction pamphlet that comes with the scope explains to the user how to set the scope to display dots every 5moa or how to display them to represent the drop at 100yd increments for one of the pre-programed ballistic groups. This can be done without either a rangefinder or the app. Once you add the free smartphone app to the equation, you then gain the option to display dots at 100yd increments for a user created ballistic profile, and even to true the muzzle velocity of that profile in the field. This comes down to being able to make what amounts to a custom reticle for your particular rifle and cartridge. This is neat in that it gives some options for using a BDX scope outside of the full BDX system. Really though, I think few people are going to buy a BDX scope for anything except going with the full rock‘n’roll BDX system.
That full rock ‘n’ roll BDX system involves pairing a BDX rangefinder and scope with the BDX smartphone app and with each other. This is super easy. You download the BDX app to your smartphone, open it up, and the options to pair a scope and rangefinder are right there on the home screen. Clicking one them walks you thorough the process. After that, the custom profiles tab gives you the option to create a ballistic profile for your specific rifle and ammunition. For the novice, this can be as simple as typing in the information off of the ammunition box for velocity and either looking up the G1 or G7 value of that ammunition in the BDX app library or typing in the one printed on the box. (Given the choice, use the one in the library: AB’s measurements of BC are better than those ammo companies will give you.) BDX users with one of the rangefinders that includes AB elite will also often have the option of looking up a “custom curve” drag model, which is basically a model based on measurements of that actual bullet made by the AB guys instead of applying what amounts to a scaling factor to the curve made by the reference G7 or G1 bullets. Essentially, the “custom curve” is likely to require less messing with on your part to get it to fit well with the actual real world behavior of your ammunition out of your rifle. In my experience so far, “custom curves” are frequently good to the 10th mil with no truing out until you hit transonic, not an experience I ever had in the past with G1 and G7 based ballistic models.
Typing this all out makes it sounds much more complicated than it is. What it really comes down to is downloading the app to your phone, and following its instructions to fill in a couple boxes with the information printed on the ammunition box. It’s super simple and you don’t have to understand very much of what is going on to get pretty good solutions (in the case of Elite, likely very good solutions) showing up right there on your scope as dots to put on the target where you want to hit. Range target, put the dot that shows up on your scope where you want the bullet to go, don’t forget about the wind, pull trigger. Sig calls it “connecting the dot.”
Reticle and Digital Focal Plane
All of the BDX scopes include an etched reticle in the second focal plane and really tiny LED strips on that etched reticle. In some cases, such as with the Sierra6BDX 3-18x44mm that I am using and the new Easy6 series, the etched reticle has some graduated features. In my case, this graduated feature is a mil dot Christmas tree. At least I think they’re meant to be mil dots. The Dots on my example are spaced at 1 mil increments at 14x. They may be intended to be 5 MOA at 18x instead. In that case, they are a bit off in scaling. That is the funny thing about 2nd focal plane rifle scopes: the graduations can mean a lot of different things at different powers. The question is, just what at what power? Certainly, the user can calibrate their second focal plane riflescope themselves and mark a line on the power ring at 14x for the proper mil scaling, if so inclined. I have such a line marked on an old Zeiss 2nd focal plane mil-dot Conquest I used years ago. This is probably outside what most BDX users are looking for though, as the BDX is designed to be an easy system. Let’s just say the Dots are at no particular intervals and have the function of helping users hold better when making corrections on follow up shots.
On BDX scopes, however, the LED strips and lighted up dots work differently. The dots will always show up at the correct place to make the shot, no matter what power the scope is set on. They are physically in the second focal plane, but they act like they are in the first focal plane because the scope recalculates where they should be based on what power you change the magnification to and automatically changes which tiny pixel on the strip is actively lit so that the one lit is at the correct position. Sig calls this the “Digital Focal Plane”, and it basically acts like the first focal plane. It is neat to watch as you turn the power ring. You can see the dot lit move up and down the strip to keep in the correct position. In case you’re worried about the resolution of the light strips, there are plenty of dots to be precise. You can just barely make out the individual positions on the strip, so it is fun to watch the one illuminated zip up and down as you change the power.
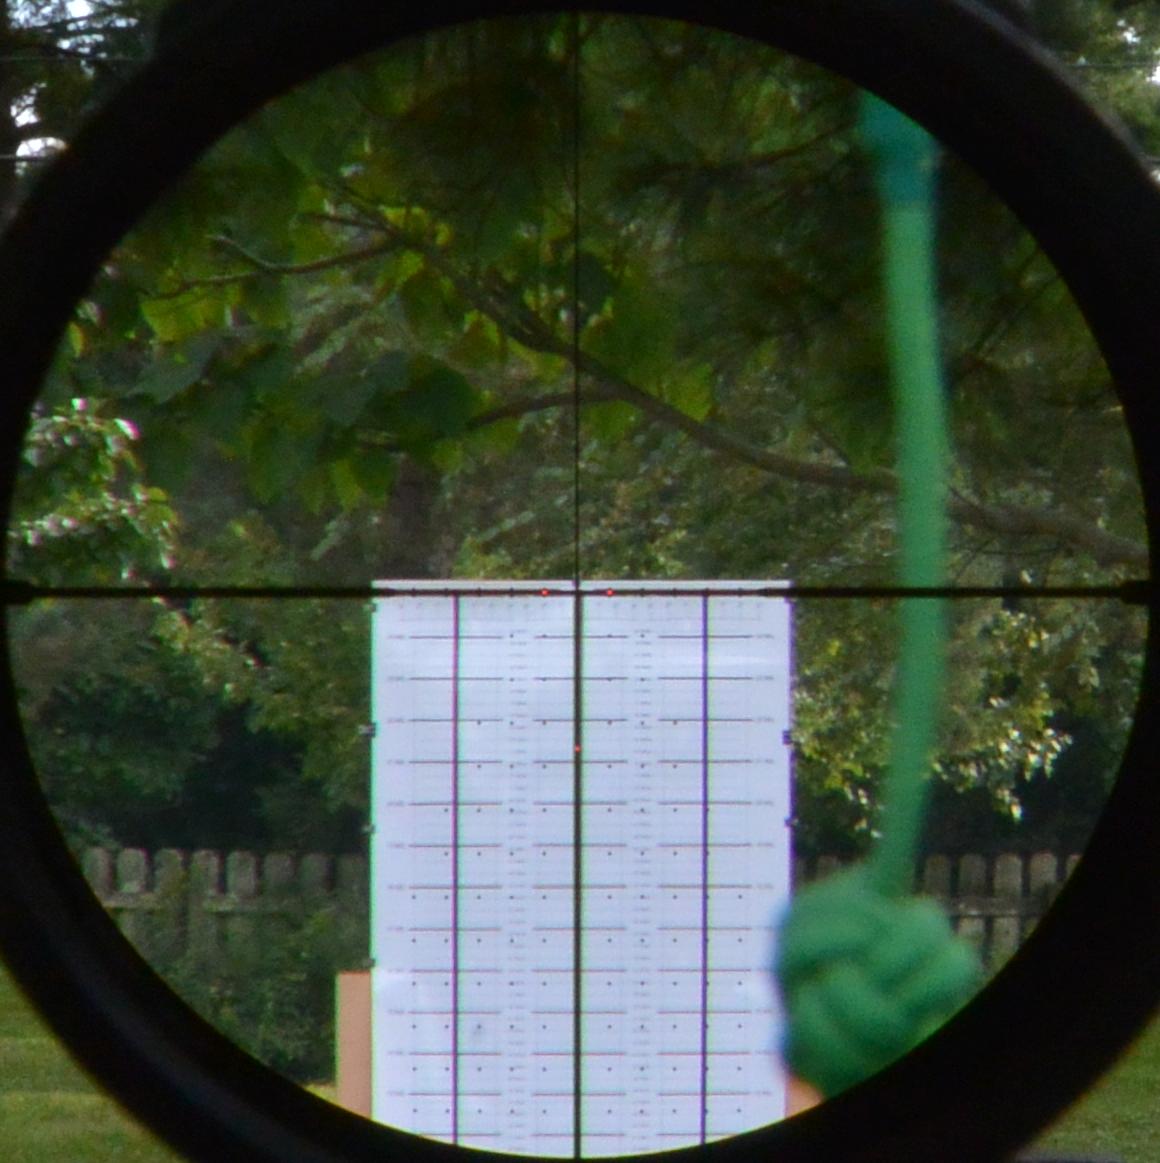
Horus CATS Calibration test Board through the Sig Sierra6BDX scope
I should mention here that the reticle has a few other high tech features. As with the Sig Tango6 5-30x56mm scope I reviewed last year, all BDX scopes include a Levelplex system with adjustable sensitivity that lets the user know if he’s canting the rifle. This is a tremendously helpful feature when it comes to long range shooting and having it right there in the reticle is greatly preferable to having to break position or strain your eyes to see it. As with the Tango6 last year, the Levelplex in this Sig Sierra tested properly calibrated. Sig has incorporated a feature into the scope called KinETHIC. This allows you to set a minimum velocity or energy for your cartridge below which the scope will inform you that the animal is too far for an ethical kill. The dot indicating the aim point will flash a particular pattern to inform you that you are ranging an animal that is too far for your ethical kill settings. You can, of course, leave this feature turned off for shooting steel. KinETHIC and LevelPlex sensitivity settings are found under the paired scope in the BDX app.
Optical Performance:
Unfortunately, the optical performance of the Sig Sierra6 BDX 3-18×44 is not great. This was apparent from the start, before even having any comparison scopes lined up for it. The eyebox was tight, the stray light handling poor, and the whole view generally a bit hazy looking. Both my brother and I noted this individually.
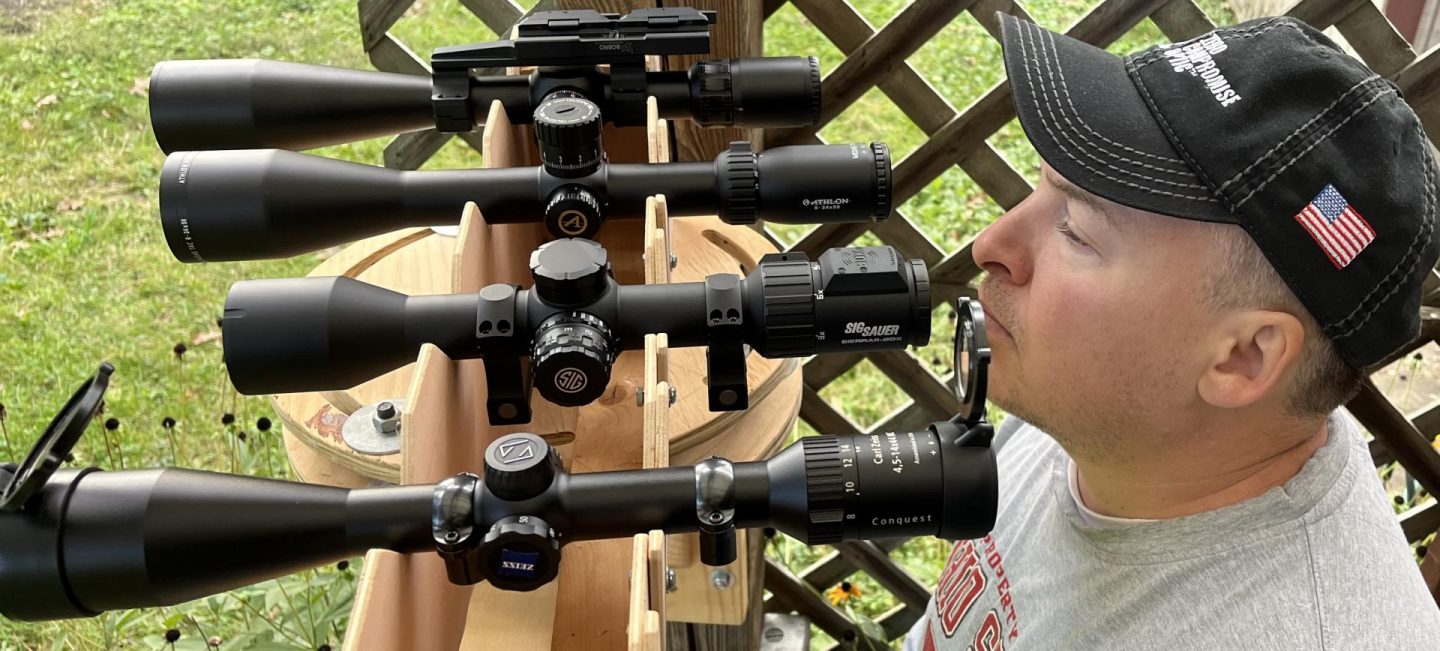
Optical testing lineup from bottom to top: Zeiss Conquest 4.5-14×44, Sig Sierra6 BDX 3-18×44, Athlon Midas TAC 6-24×50, Sightron PLR FFP 6-24×50
Once I set the Sierra6 up on the comparator, and ran though my typical tests, more details emerged. In most areas of optical performance, the Sig Sierra6 BDX 3-18×44 significantly lagged the comparison scopes from its price range. Its high points were that its 6x erector ratio is obviously much larger than the comparison scopes. The Sierra6 BDX also had better depth of field that the other comparison scopes and its field of view was not bad. In most areas of performance that don’t show up in a specifications sheet though, its performance was well below the comparison scopes. This includes resolution, chromatic aberration, eyebox, edge-to-edge clarity, low light performance, color rendition, and contrast. Its stray light handling is also poor. You should definitely use that substantial sunshade it comes with. The takeaway from this is that the Sig Sierra6 BDX scope is a $1,000 scope not because it has $1,000 worth of optical performance, but because it has some great tech built in. Its optical performance is well below that price point and it doesn’t take a trained eye to make this judgment. The Sierra6’s eyebox is pretty small, for instance, and you often find yourself hunting for the sweet spot. The resolution is also noticeably not great, with the chromatic aberration not helping either. Its just not a great scope optically. For what it’s worth though, it’s better than I remember the TrackingPoint being when I shot that a few years ago.
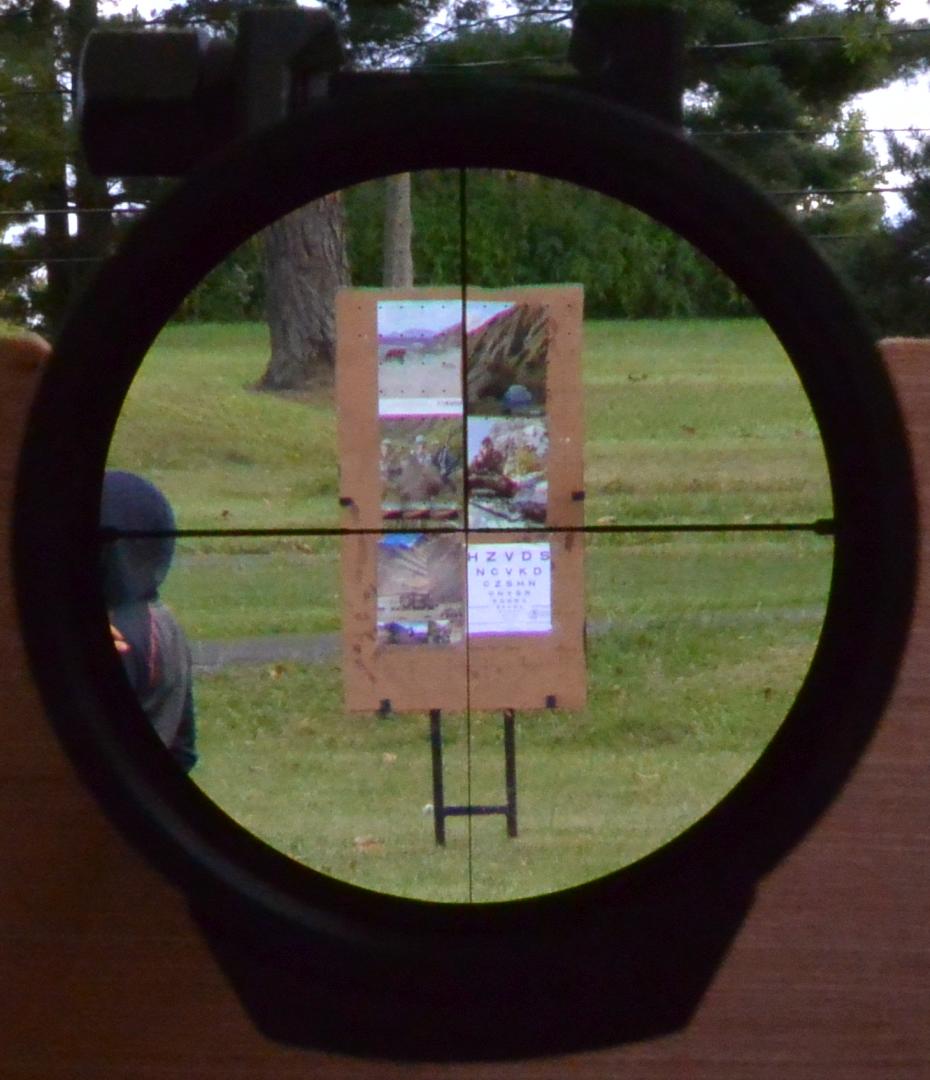
Optical test board through the Sig Sierra6 3-18×44
Mechanical and Digital Reticle Testing
With most long range rifle scopes, it is the adjustments and reticle size that are used to adjust for drop and wind compensation at range and so I test them thoroughly to make sure they are sized correctly and track properly. There are a few adjustments that needed to be thus tested on the Sig BDX. These are the parallax, power ring, and diopter. None of them moved the POI when adjusted, which is how it should be. I should note that the parallax knob on the Sig Sierra6 is marked with yardages but that these are not calibrated. This is as it is on most scopes, but users sometimes don’t know this and mistakenly try to use the parallax as a rangefinder. Even if calibrated, this does not work well enough to be useful and most, like this Sig, are not calibrated anyway. Because the elevation and windage adjustments were not intended to be used for anything but zeroing, I did not test their magnitude or tracking on the Sig Sierra6. They zeroed the scope fine and that is all to be expected from them. Instead, I tested the feature intended to be used for ballistic compensation, the illuminated dot placement. I did this by ranging different distances and comparing the drop number the rangefinder spit out, with the actual dot placement on my calibrated target. I did this at several magnifications for each drop resulting in the following table.
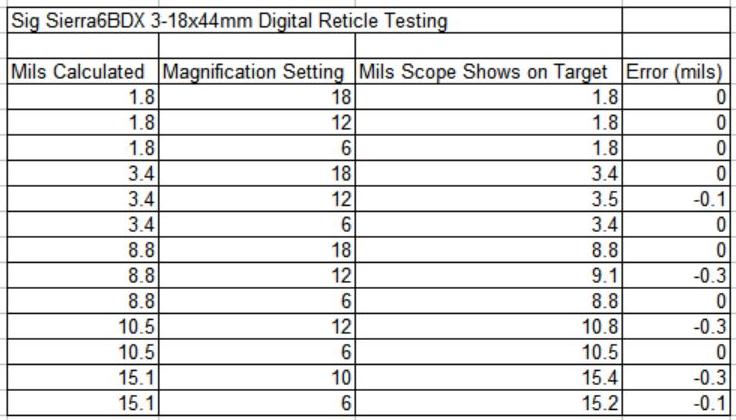
Sig Sierra6 BDX 3-18×44 Digital Reticle Testing Table
What error the BDX shows is tied to a slight deviance in where it calculated the power ring was. It was the highest at around 12x and lowest at 18x and 6x. This is apparent in the table, but was much more so when actually doing the testing as I sat behind the scope looking though it as I changed the power. I watched the dot move a little off the mark as it rotated to 12x and then back as it continued on to 6x. As you might expect, this error also magnified with the amount of drop needed for the shot, and so was higher on the longer shots. At 3.4mils drop, for instance, the maximum amount of error a shooter could have was .1 mils at 12x whereas you could get .3 mils error at 10.5 mils drop.
To be frank, this is the first time I have ever tested the performance of a scope of this variety. I had no idea what level of performance should be expected from such a system. Even now, I haven’t a clue how much variance should be expected from one BDX scope to another or how Sig’s standards line up with those of its limited competitors in the smart rifle scope market. I have a sample size of one. What I do know is I would consider the degree of accuracy this BDX reticle put out very good. I expected more error in the technology and I think a maximum error of .1mils in a 500yd .308 shot introduced from the sighting system to be quite good. I feel a little hypocritical in this as I would not be happy with a 3% error I could not easily correct at 10 mils in a traditional precision rifle scope, but it seems to me this is quite acceptable in a system designed to function right out of the box with no specialized knowledge required.
Summary and Conclusion:
The promise of the BDX 2.0 system is to help a hunter with limited knowledge of ballistics deliver shots more accurately and farther than a conventional scope would. It fulfills this to an almost comical degree. With just the numbers off the ammo box, the BDX system is going to get the shooter on the game in most scenarios, really all the way out to transonic. I expect this is a huge leap forward in probability of delivering a hit for most hunters.
As such, I encourage those picking up a BDX system to do more than take it to the 100yd square range. Take it to a real long range and shoot some steel out as far as you intend to take game. Take note of what shot dispersion you are seeing at different distances and true your velocity if need be. There are some great videos on this. I say this because, with the BDX 2.0 system, you’re simply not going to be cleanly missing shots even out to very long distances. It is going to put you on target. You will, for instance, be more likely to hit that deer at 800 yards with a 6.5CM using only the data off the box, a 100yd zero, and no wind read, than you are to miss it. You should probably not shoot at that deer at 800 yards though, as the chances of a maim are much higher than those of a clean kill. Only practicing at the distances you intend to hunt at can establish for you just what degree of shot dispersion you should expect at different ranges and in different wind conditions. Do this, as you’re going to be exponentially more successful with the BDX system than you were before, and you don’t want to be that guy that knows just enough to get himself in trouble. The BDX system is a very powerful tool. There is no gimmick here – it works.
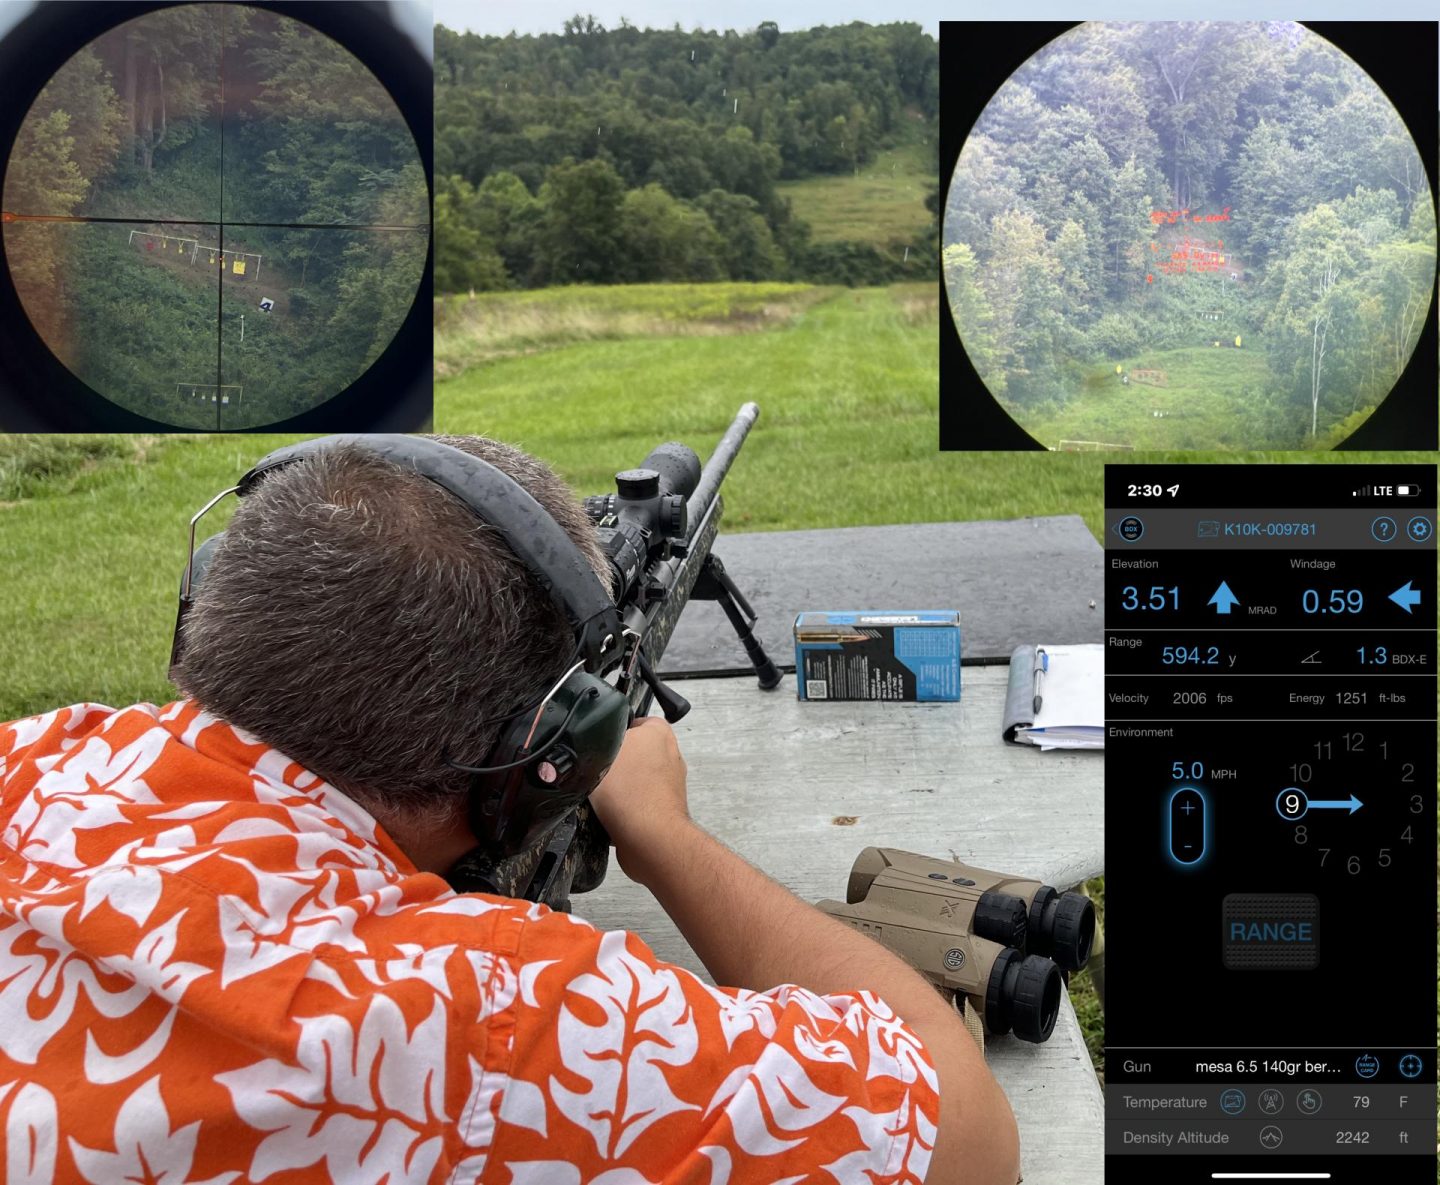
Demonstrating Sig BDX 2.0 System with the Mesa Precision Arms Crux 6.5CM
In addition to ‘shoot where the glowing dot is’ simplicity, the BDX system has some other things going for it. The modular mix and match rangefinder + scope arrangement gives you a tremendous number of options in price, performance, and form factor. You can get into a scope + rangefinder combo as low as $550 street. That seems a tremendous value to me, given the effectiveness of the technology. Throughout my testing, Sig’s BDX software proved very easy to set up and use, with a very low barrier to entry when it comes to specialized long range shooting knowledge. Connections between the components were also totally stable. Not always a given with Bluetooth. Built in to BDX scopes you will find a digital level system called LevelPlex. This has proven excellent both times I have now tested it. Sig’s KinETHIC system is likewise an excellent addition for reminding the hunter of the distance limits he sets for himself.
The only disappointment that I had with the Sig Sierra6 BDX 3-18×44 scope I tested was that it was not as good optically as I would expect for a scope at ~$1,000. This is not a totally fair complaint though, as you are really buying a lot of tech in that $1k and probably should not expect glass on par with conventional ~$1k optics.
Written by BigJimFish